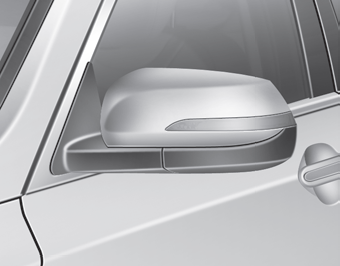
Hyundai Genesis: Mirrors / Outside rearview mirror

Be sure to adjust mirror angles before driving.
Your vehicle is equipped with both left-hand and right-hand outside rearview mirrors. The mirrors can be adjusted remotely with the remote switch. The mirror heads can be folded to prevent damage during an automatic car wash or when passing through a narrow street.
The right outside rearview mirror is convex. Objects seen in the mirror are closer than they appear.
Use your interior rearview mirror or direct observation to determine the actual distance of following vehicles when changing lanes.
WARNING
Do not adjust or fold the outside rearview mirrors while driving. This may cause loss of vehicle control resulting in an accident.
CAUTION
- Do not scrape ice off the mirror face; this may damage the surface of the glass.
- If the mirror is jammed with ice, do not adjust the mirror by force. Use an approved spray de-icer (not radiator antifreeze) spray, or a sponge or soft cloth with very warm water, or move the vehicle to a warm place and allow the ice to melt.
.jpg)
Adjusting the rearview mirrors:
1. Press either the L (driver's side) or R (passenger's side) button (1) to select the rearview mirror you would like to adjust.
2. Use the mirror adjustment control (2) to position the selected mirror up, down, left or right.
3. After adjustment, press the L or R button (1) again to prevent inadvertent adjustment.
CAUTION
- The mirrors stop moving in possession. (if equipped) when they reach the maximum adjusting angles, but the motor continues to operate while the switch is pressed. Do not press the switch longer than necessary, the motor may be damaged.
- Do not attempt to adjust the outside rearview mirror by hand or the motor may be damaged.
 Electric chromic mirror (ECM)
with compass and HomeLink®
system (for Canada)
Your vehicle may be equipped with a
Gentex Automatic-Dimming Mirror
with a Z-Nav™ Electronic Compass
Display and an Integrated HomeLink®
Wireless Control System.
During nighttime driving, ...
 Folding/Unfolding the outside
rearview mirror
The outside rearview mirror can be
folded or unfolded by pressing the
switch when:
Left (1) : The mirror will unfold.
Right (2) : The mirror will fold.
Center (AUTO) :
The mirror will fold o ...
Other information:
Hyundai Genesis (DH) 2013-2016 Owners Manual: Care of seat belts
Seat belt systems should never be disassembled or modified. In addition, care should be taken to assure that seat belts and belt hardware are not damaged by seat hinges, doors or other abuse. Periodic inspection All seat belts should be inspected periodically for wear or damage of an ...
Hyundai Genesis (DH) 2013-2016 Service Manual: Steering Angle Sensor Repair procedures
Adjustment Calibration (Setting up the zero angle) Steering Wheel Angle Sensor of an absolute angle type (CAN type) measures the angle under the standard of the zero angle set. Calibration must be performed in the following cases: - Replacement of the Steering Wheel Angle Speed Sensor - ...
