Hyundai Genesis: SRSCM / SRS Control Module (SRSCM) Repair procedures
Hyundai Genesis (DH) 2013-2016 Service Manual / Restraint / SRSCM / SRS Control Module (SRSCM) Repair procedures
| Removal |
| 1. |
Turn the engine OFF. |
| 2. |
Disconnect the battery negative cable and wait for at least three minutes before beginning work. |
| 3. |
Remove the floor console assembly.
(Refer to Body - "Floor Console Assembly") |
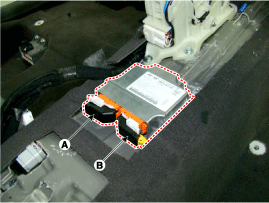
| 4. |
Pull up the lock of the SRSCM connector to disconnect the connector (A and B).
|
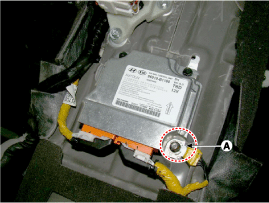
| 5. |
Remove the SRSCM mounting bolts (3EA) from the SRSCM, then remove the SRSCM.
|

| Installation |
| 1. |
Turn the engine OFF. |
| 2. |
Disconnect the battery negative cable and wait for at least three minutes before beginning work. |
| 3. |
Install the SRSCM with the SRSCM mounting bolts (A) (3).
|


| 4. |
Connect the SRSCM harness connector. |
| 5. |
Install the floor console assembly.
(Refer to Body - "Floor Console Assembly") |
| 6. |
Reconnect the battery negative cable. |
| 7. |
After installing the SRSCM, confirm proper system operation:
Turn the ignition switch ON; the SRS indicator light should be turned on for about six seconds and then go off.
|
| Variant Coding |
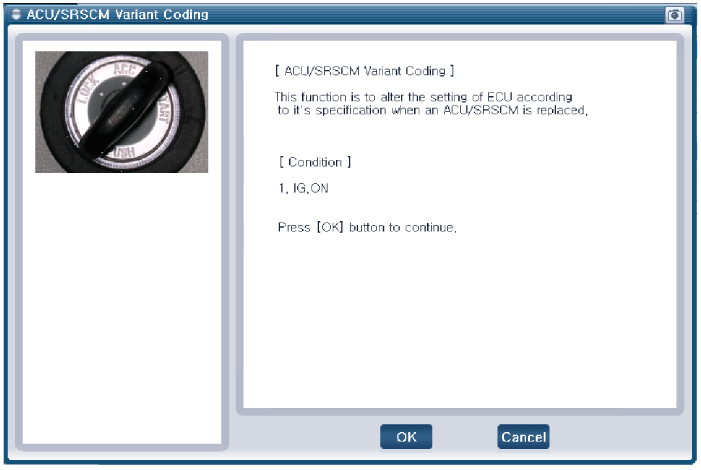
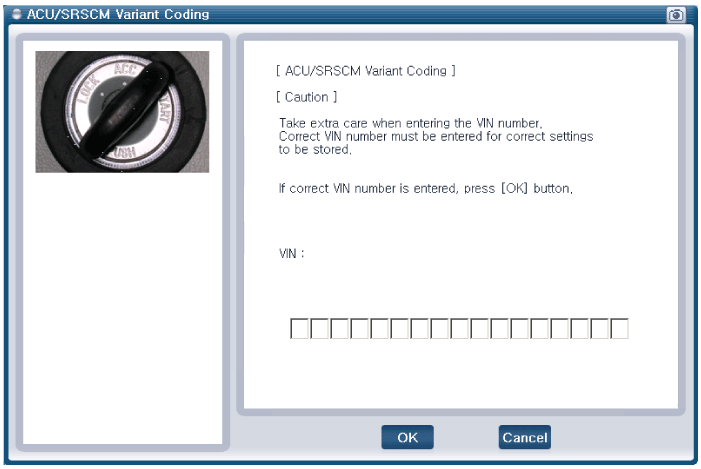
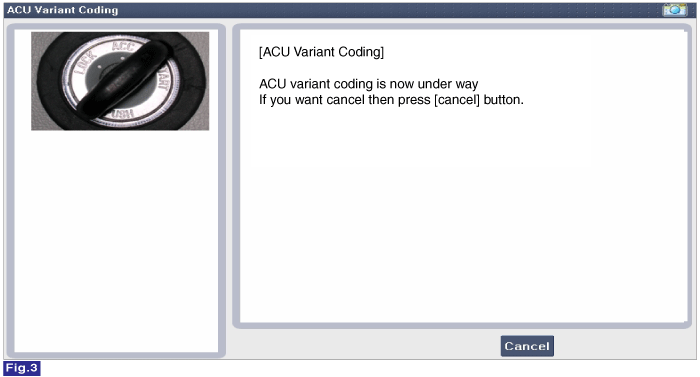
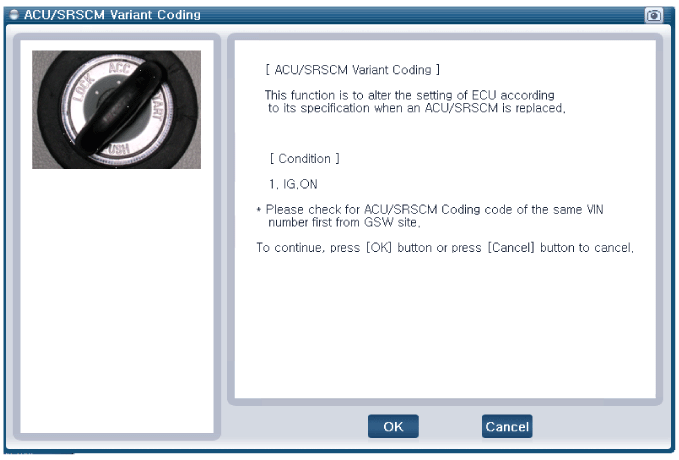
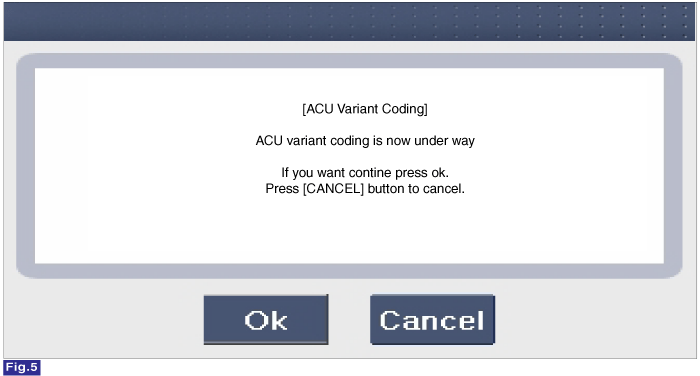
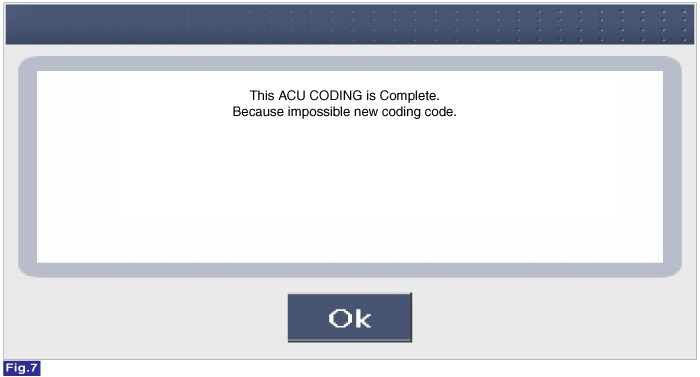
After replacing the SRSCM with a new one, the “Variant Coding” procedure must be performed.
|
Variant Coding Procedure
| ?nbsp; On-line type on GDS |
| 1. |
Turn the ignition switch OFF. |
| 2. |
Connect the GDS. |
| 3. |
Turn the ignition switch ON without the engine running. |
| 4. |
Select vehicle name and airbag system. |
| 5. |
Select variant coding mode. |
| 6. |
Follow the steps on the screen below.
|


|

?nbsp; Off-line type on GDS (Use when not connected to the internet)
| 1. |
Turn the ignition switch OFF. |
| 2. |
Connect the GDS. |
| 3. |
Turn the ignition switch ON without the engine running. |
| 4. |
Select vehicle name and airbag system. |
| 5. |
Select variant coding mode. |
| 6. |
Follow the steps on the screen below.
|


 Front Impact Sensor (FIS) Description and Operation
Description
The front impact sensor (FIS) is installed in the Front End
Module (FEM). They are remote sensors that detect acceleration due to a
collision at its mounting location. The primary p ...
Other information:
Hyundai Genesis (DH) 2013-2016 Service Manual: Cluster Ionizer Description and Operation
Description The cluster ionizer disinfects and decomposes bad smell from the air-conditioner or inflow air in order to clean the indoor air of a vehicle. When the ignition switch is ON, the ionizer runs "CLEAN" mode and then "ION" mode, switching between both modes. In the “CLEAN” mode ...
Hyundai Genesis (DH) 2013-2016 Service Manual: Description and Operation
Description Integrated Rain Sensor Integrated rain sensor (A) controls three systems: front wiper, auto-light, and central air conditioner. 1. Wiper Control System When "AUTO" switch signal is received from the multi-function switch on the right, the integrated rain sensor detects the amo ...
© 2013-2025 www.hgenesisdh.com
